This is a showcase of an Unreal Engine automotive animation and visualization project for Mahindra, a multinational automotive manufacturing corporation, to promote the launch of their BE RALL-E Concept SUV.
We decided to do things a bit differently for this CG animated automotive promo and create it all in Unreal Engine.
We decided to use a very complicated terrain to animate a SUV inside but the decision to use Unreal worked out to be a great overall solution considering the very short deadline we all had to create the video by.
This was a really fun project to do in collaboration with our friends at TRUE BLACK and DUSTED.
Mahindra wanted to create a dynamic product launch video for their new E powered BE RALL-E 4 -wheel drive SUV, the only problem was that the car was still at the concept clay stage and couldnt actually drive, plus the only existing full-scale model was being shipped to another country for a photo shoot.
So the only other option was to create a ‘digital double’ in CGI and then make it move, oh and we had a very short amount of time to do this in as Mahindra had a huge live product launch event happening in 4.5 weeks’ time so we needed to ‘get motoring on this’ excuse the pun.
If this was not a big enough challenge, we decided to drive the virtual car through some very bumpy scrub land to show off this awesome new 4- wheel drive electric vehicle.
We decided to create an Unreal Engine automotive animation using Unreal to create all the animated scenes within.
We partnered with our friends at True Black who took care of the final edit, motion graphics and audio compositing while we tackled creating all the rendered scenes, CG models, animating them, and setting up the virtual environments.
Check out our Unreal Engine Automotive Animation, we hope you like it
The environment for our Unreal Engine automotive animation was set in an untamed national park somewhere hot and dry with undulating terrain, shot at the Golden hour. We wanted to use a dramatic landscape which would allow us to ‘virtually’ demonstrate the rugged performance of this cool looking off roader. What we loved about this was that we had full creative licence, so we were able to have some fun with the animation and we used this opportunity to fling this off roader around the track and over hills to show off what this prototype could potentially do. However, as we were to find out later, this would prove to be one of the more difficult parts of the project.
In a ‘nutshell’ here is a quick break down of the steps we took to create the Unreal Engine automotive animation shots.
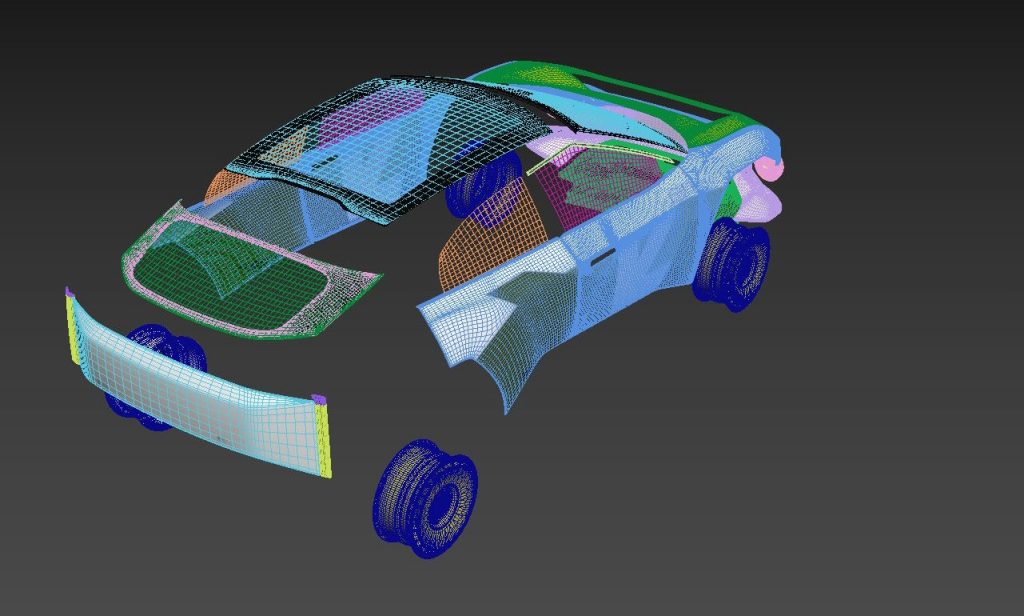
Remodelled the whole car (to get a nice clean renderable geometry) as the supplied model could not be rendered correctly.
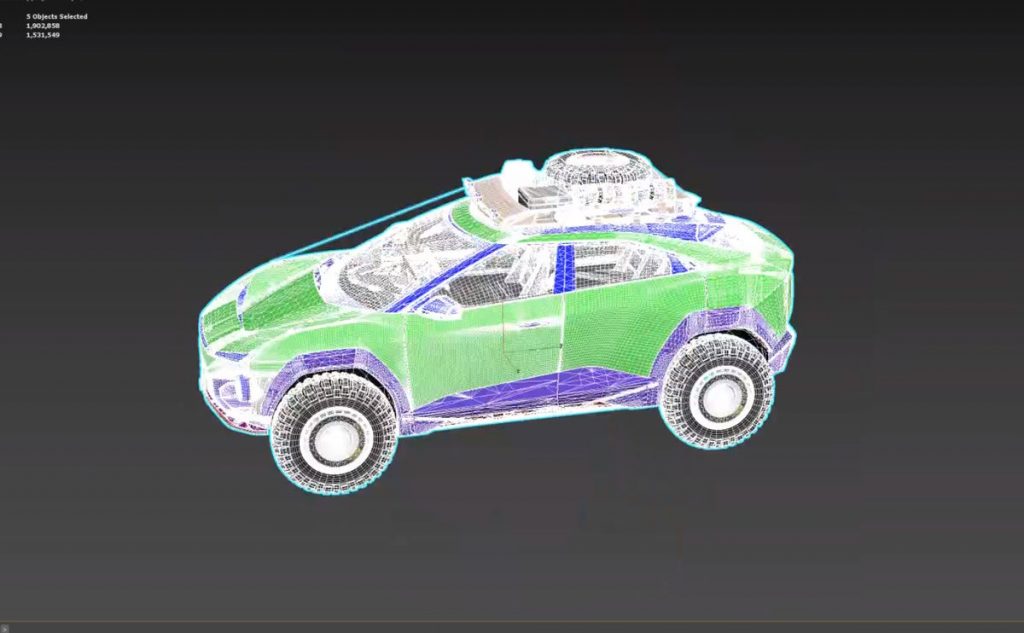
We applied an animatable car rig inside our CG Software (3D Studio Max) because we couldn’t use the bespoke automotive rig in Unreal on this occasion.
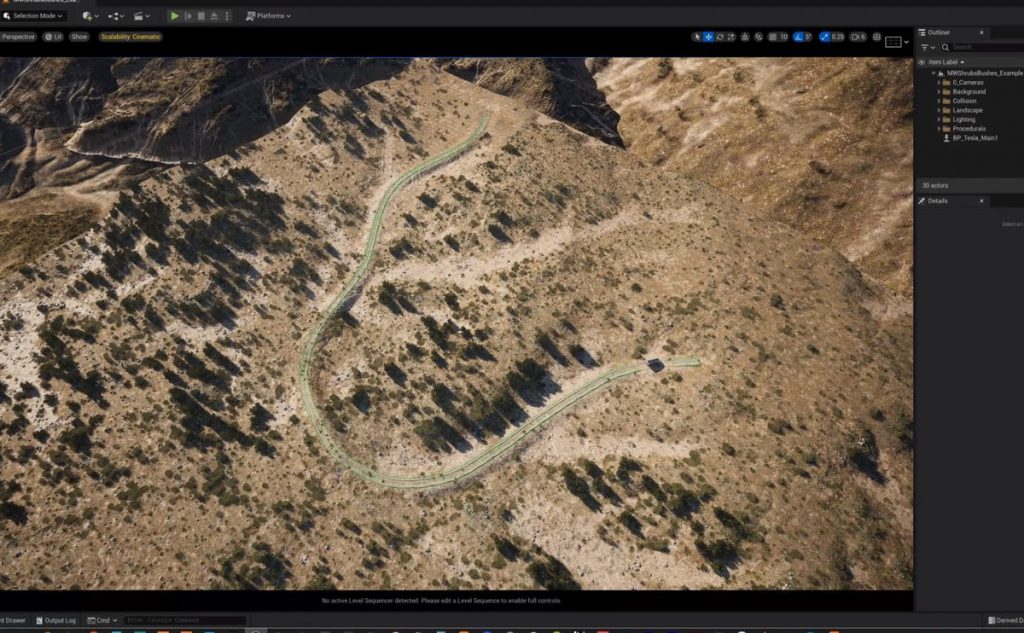
We replicated the road section of the pre bought Unreal environment Inside 3D Studio Max that matched exactly the Unreal scene.
We animated the car attached to the automotive rig inside 3D Studio Max and threw it around the 3d track.
We exported the keyframes attached to the 3D Model from 3D Studio Max back into the Unreal stock environment.
We textured the car.

We set the time of day to ‘The Golden Hour’ the last hour before sunset.
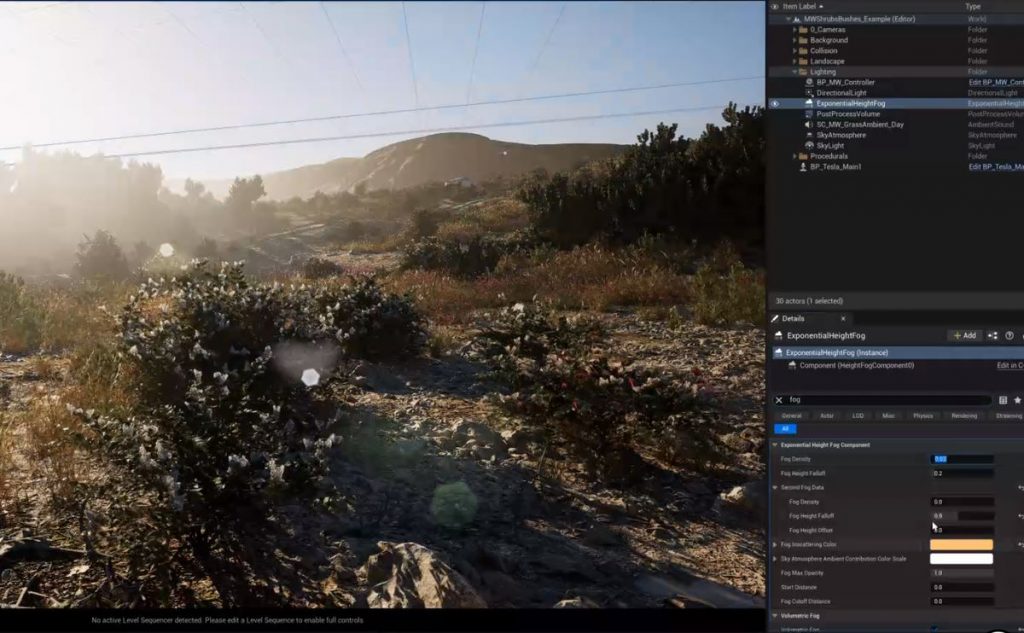
We set the Virtual cameras inside UNREAL.
We added Unreal’s bespoke particle effects to generate the dust and smoke from the wheels.
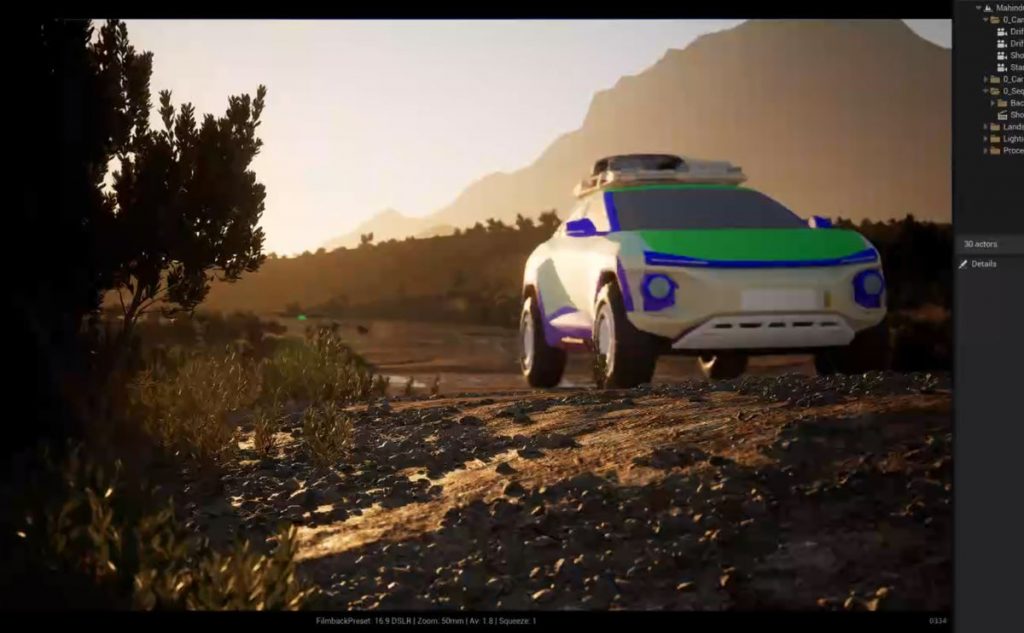
We exported the car and camera movement out as rendered EXR sequences.
We graded each individual shot.
The Editors then composited in the rendered shots exported from UNREAL back into the master edit in Adobe Premiere
We are crazy about all things cars, and anytime we get to create automotive work we jump at it. Usually, we would have used a traditional CGI / 3D modelling and rendering pipeline, but the parameters of this project meant that the only viable option was to build a car and create a big enough landscape for us to animate around it quickly, meant we needed to create in something more dynamic and work in real-time pipeline. This is where we decided creating an Unreal Engine automotive animation was the best option for this project.
One of the biggest considerations was to find and use a stock animated 3D environment which gave us a beautiful world to play around in, which had enough of it to enable us to also grab out some epic environment shots (using traditional CGI would have meant we would have spent the whole allocated production time and, inevitably, budget, just Kit bashing an environment together and trying to animate environmental effects inside it).
Every project we create there is valuable learning and we wanted to share a few challenges we encountered and how we resolved them.
When working with supplied 3d model assets from the manufacturer they often have to be remodelled from scratch to make them clean and efficient to work with and have the right normal orientation otherwise you can run into situations where a programme like Unreal Engine becomes very picky about what it accepts and creates undesirable effects like flickering textures, missing reflections or like what we found on this project we had some issues generating shadows in the render output even though we could see them in the live viewport. After much trial and error, we found the issue and had to remodel additional parts of the car which resulted with the shadows showing back up in the final renders.
Try to allow time and budget for clean models to be built because 80% of engineering automotive models are not usable in 3D rendering and real-time software, because they are very dense and often have broken vertices resulting in badly welded meshes which don’t render correctly or slow down the processing speed.
Double check your Unreal environment models are made from meshes and not just instances , especially when you want to drive a vehicle over bumpy ground as you may get undesirable effects where the vehicle crashes through the floor. Instance models are only made from bump maps, and not solid geometry, which external car rigs inside other 3d software cannot reference and, consequently, read them as flat plains.
To create Killer particle effects like smoke and dust, you may want to consider importing VDB files from an external package like Houdini or 3D Studio Max into your Unreal scene rather than relying on Unreal’s native particle system. These often produce much better results but, be warned, they can also slow the scenes down a lot, but we found we needed to keep these export file size to under 8GB to get them inside UNREAL.
If you have an upcoming project would like to know more about Unreal Engine Automotive Animation or our other Unreal Engine services then please get in touch with your brief and estimate budget on 0203 848 9035 or email info@immersivestudio.co.uk or complete the contact form below.